Author name: Emily Jake

Emily Jake is a fashionista with an eye for trends and a love for all things stylish. Her blog is a blend of outfit inspirations, trend analyses, and fashion tips. Follow her for a daily dose of elegance and chic fashion advice.

A woman with a glowing skin-Does Dermaplaning Cause Acne

Does Dermaplaning Cause Acne?: Unveiling the Truth

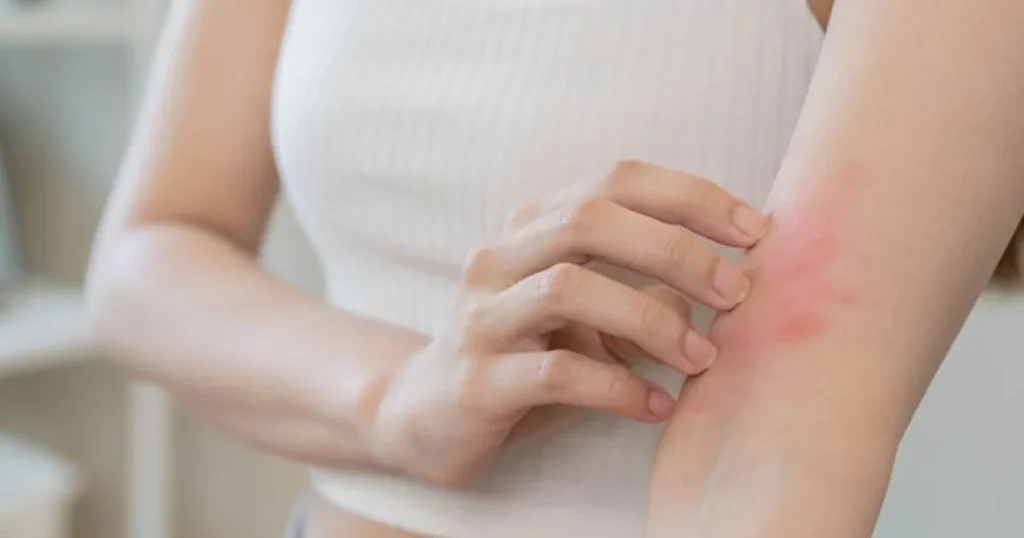
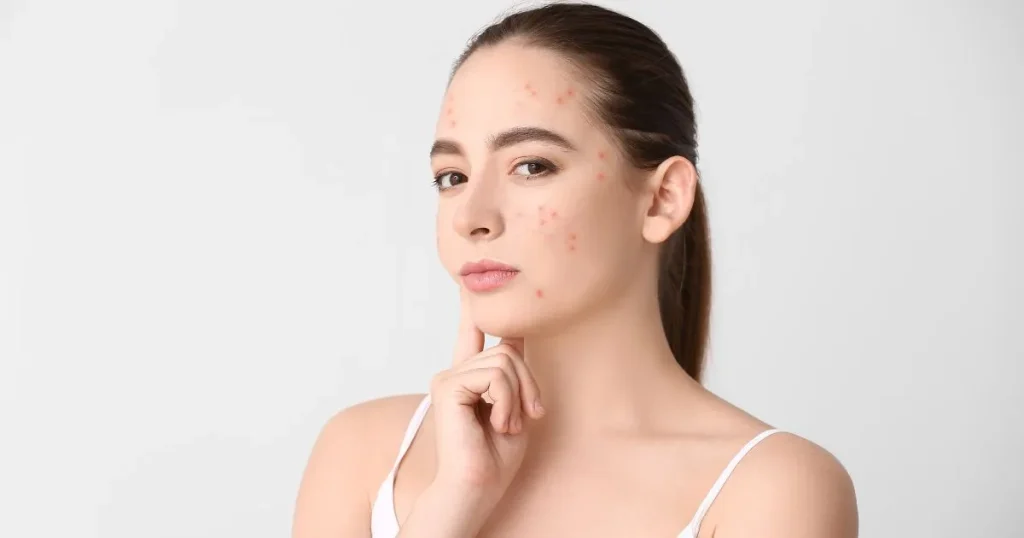
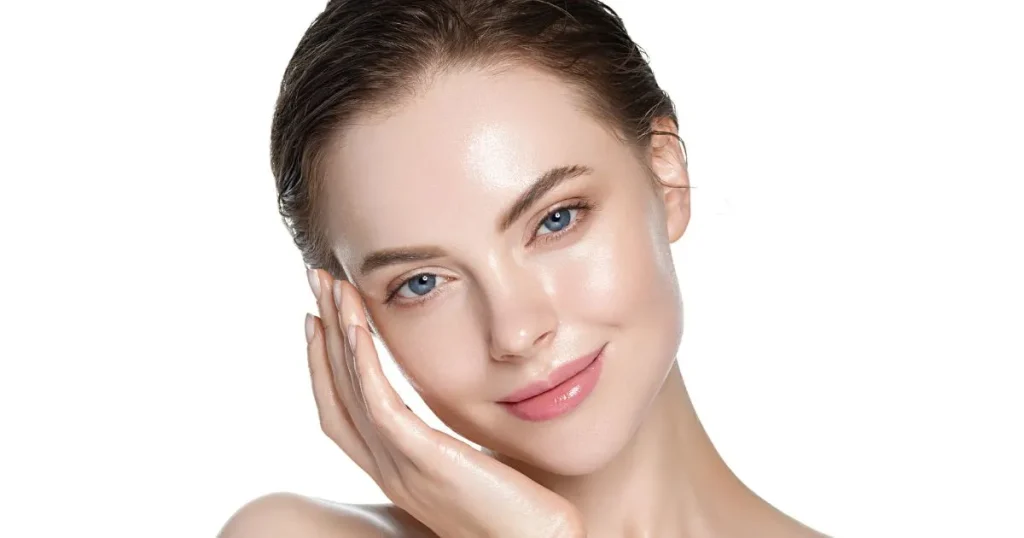
Have you ever wondered if dermaplaning, a popular skincare treatment, could actually cause acne? Understanding the relationship between dermaplaning and acne is crucial. Many people turn to dermaplaning for smoother skin, but it’s important to know if this treatment could potentially lead to breakouts. If you’re considering dermaplaning, knowing how it might impact your skin is crucial, especially if you have acne concerns. Knowing the facts helps you make an informed decision and achieve the best possible results from the treatment. In this article we’ll explore does dermaplaning cause acne. We’ll look at how dermaplaning affects the skin, especially for those with acne or prone to breakouts. Understanding this connection is essential for anyone thinking about getting the treatment. What is Dermaplaning? Definition and Description of the Procedure Dermaplaning is a skincare treatment that uses a sterile blade to gently scrape off dead skin cells and fine facial hair. A trained professional usually performs it. How It Differs from Other Exfoliation Methods Unlike chemical peels or microdermabrasion, dermaplaning is a physical exfoliation method. It doesn’t use chemicals or abrasive materials, making it suitable for most skin types. Benefits of Dermaplaning Dermaplaning removes the top layer of dead skin cells, leaving your skin feeling smoother and looking brighter. Without the barrier of dead skin cells, your skincare products can penetrate deeper into the skin, making them more effective. The treatment also removes peach fuzz (the fine hair on your face), which can make your skin look smoother and help makeup go on more evenly. Removing dead skin cells and fine hair results in a smoother skin texture, reducing the appearance of roughness and unevenness. Dermaplaning can impart a natural glow to the skin, making it look refreshed and rejuvenated. Regular dermaplaning may help reduce the visibility of fine lines and wrinkles, promoting a youthful appearance. Dermaplaning is generally safe for various skin types, including sensitive skin, when performed by a skilled professional. Common Misconceptions About Dermaplaning There are a few myths about dermaplaning that need clearing up: Does Dermaplaning Cause Acne? Dermaplaning, touted for its skin-smoothing benefits, has a darker side that needs attention. Let’s explore the potential acne-related concerns associated with this popular skincare procedure. Over-Exfoliation and Irritation One of the primary concerns with dermaplaning is the risk of over-exfoliation. This process involves scraping off the top layer of skin, which can lead to irritation, especially for sensitive skin. Over-exfoliation can disrupt the skin’s natural barrier, making it more prone to redness, inflammation, and breakouts. Risk of Acne Breakouts Contrary to its intended purpose of improving skin texture, dermaplaning can sometimes trigger acne breakouts. Removing peach fuzz and dead skin cells may inadvertently clog pores or cause micro-tears in the skin, leading to acne lesions. Hair Growth Misconceptions While dermaplaning effectively removes fine facial hair (vellus hair), there’s a misconception that it can lead to thicker or darker hair regrowth. However, scientific evidence suggests that dermaplaning does not alter the texture or color of hair follicles. Unfavorable for Certain Skin Types Not all skin types are suitable for dermaplaning. Individuals with active acne, eczema, rosacea, or sensitive skin may find dermaplaning too harsh and potent, potentially their skin conditions. It’s crucial to consult a dermatologist before undergoing this procedure, especially if you have pre-existing skin concerns. Inability to Treat Acne Scarring Despite its exfoliating properties, dermaplaning is not designed to treat acne scars. Deeper acne scars require more targeted treatments like laser therapy or chemical peels. Relying solely on dermaplaning for scar removal may lead to disappointment and ineffective results. The Risk of Physical Damage Improper technique or aggressive dermaplaning can result in physical damage to the skin. This includes cuts, nicks, or abrasions, which cause discomfort and increase the risk of infection and further skin irritation. Addressing Acne Concerns Post-Dermaplaning Break Out After Dermaplaning Some individuals may experience breakouts after dermaplaning due to several factors. One reason is the removal of peach fuzz and dead skin cells, which can sometimes lead to clogged pores and trapped bacteria, causing acne. Over-exfoliation during dermaplaning can also irritate the skin, triggering breakouts in sensitive individuals. Cause of Bad Reactions A bad reaction to dermaplaning can occur for various reasons. First, improper techniques or tools can damage the skin, leading to irritation, redness, and breakouts. Second, individuals with sensitive skin or certain skin conditions may experience adverse reactions post-dermaplaning. Frequency of Dermaplaning The frequency of dermaplaning can impact acne differently for each individual. While some may find regular dermaplaning helpful in preventing acne by removing dead skin cells and excess oil, others may experience increased breakouts due to over-exfoliation and skin irritation. Finding the right balance and consulting a skincare professional for guidance is crucial. Can Dermaplaning Cause Cystic Acne? Dermaplaning itself typically does not directly cause cystic acne. However, individuals prone to cystic acne should approach dermaplaning cautiously, as excessive exfoliation can exacerbate existing acne conditions. Consulting a dermatologist is recommended for those with severe acne concerns. Effects of Dermaplaning on Acne Scars Dermaplaning may help improve the appearance of acne scars by promoting cell turnover and enhancing the penetration of skincare products. However, it’s essential to note that dermaplaning alone may not effectively treat deep or severe acne scars. Combination treatments and professional advice are often necessary for scar reduction. Alternatives and Precautions If you’re worried about getting acne after dermaplaning, try other ways to exfoliate your skin. Chemical peels or gentle exfoliating scrubs can be good options. These methods can help keep your skin smooth without causing irritation or breakouts. Additionally, taking precautions such as using skincare products suitable for acne-prone skin and following a proper skincare routine can help mitigate acne risks. Professional vs. At-Home Dermaplaning When considering dermaplaning, it is crucial to decide between professional treatments and at-home kits. Professional dermaplaning sessions are typically performed by trained estheticians using high-quality tools, ensuring safety and effectiveness. On the other hand, at-home dermaplaning requires careful attention to techniques and hygiene to avoid adverse reactions. Managing Breakouts and Acne-Prone Skin

Does Dermaplaning Cause Acne?: Unveiling the Truth Read More »

Avocado oil-Avocado Oil for Hair

Avocado Oil for Hair: Benefits and Application Methods

In the never-ending quest for luscious locks, beauty enthusiasts and health-conscious consumers are turning to the bounties of nature for their hair care solutions. Among the stars of this green revolution is avocado oil—a versatile elixir reputed for its nourishing properties. Rich in antioxidants, minerals, and beneficial fats, avocado oil has transcended its role in the culinary world to grace the shelves of beauty stores and the vanities of those seeking to revitalize their tresses. If you’ve been contemplating a switch to all-natural hair remedies, read on to discover how avocado oil could be your hair’s new best friend. Avocado Oil Explained Before exploring its benefits, it’s essential to understand avocado oil. It’s extracted from the flesh of the avocado fruit, making it a natural byproduct of one of the world’s healthiest foods. The cold-pressing method ensures the retention of the oil’s high nutrient content, including vitamins E, A, D, and B, along with minerals like potassium. This complex nutritional profile gives avocado oil its moisturizing and restorative qualities, which make it perfect for hair care. Benefits of Avocado Oil for Hair The benefits of avocado oil for hair are extensive, making it a staple ingredient for anyone looking to maintain healthy and vibrant tresses. Here’s a closer look at the ways avocado oil could transform your hair care routine. Intense Moisturization and Hydration Avocado oil profoundly moisturizes, penetrating the hair shaft to hydrate from within. Unlike mineral oils, which can coat the hair, avocado oil’s smaller molecular size allows it to be absorbed, leaving hair soft, supple, and less prone to breakage. Strength and Elasticity The oil’s rich content of monounsaturated fats, amino acids, and antioxidants promotes hair strength, helping to prevent the environmental and chemical damage that can lead to brittle strands and split ends. Additionally, its ability to bolster the hair’s natural elasticity means less breakage and healthier growth. Scalp Health A healthy scalp is crucial for healthy hair; avocado oil can help achieve that. It’s a natural anti-inflammatory that can soothe scalp conditions like dandruff or psoriasis. Regular application of avocado oil can also help balance oil production, leaving your scalp feeling nourished and your hair vibrant. Revitalizing and Glossifying It’s a natural shine booster! The monounsaturated fats in avocado oil can help give your hair a glossy sheen without any downsides often associated with synthetic silicones. Incorporating Avocado Oil into Your Hair Care Routine Now that we’ve extolled the virtues of avocado oil, how do you use it? Here are some practical application methods to integrate avocado oil into your hair care regimen. Pre-Shampoo Treatment A pre-shampoo, or a pre-poo, involves applying avocado oil to your hair and scalp before you shower. This treatment can help protect the hair from the drying effects of shampoo, particularly for those with textured or dry hair types. Warm the oil in your hands and apply from root to tip, then leave it on for at least 30 minutes before shampooing as usual. Conditioner Boost Revamp your conditioner by adding a few drops of avocado oil just before application. This can give your hair a stronger moisture kick and provide extra hydration, especially for those with particularly dry or damaged hair. Scalp Massage Scalp health is irrevocably linked to hair health, and giving yourself a gentle scalp massage with avocado oil can be highly beneficial. It is a relaxing experience and can boost circulation, promote hair growth, and even offer sun protection, acting as a natural barrier against UV rays. Sourcing Quality Avocado Oil Hair Products If you prefer the convenience of ready-made products, plenty of shampoos, conditioners, and hair masks are enriched with avocado oil. For the best results, look for products with high avocado oil content and minimal additives while shopping. DIY Avocado Oil Hair Masks and Treatments For the crafty beauty enthusiast, creating your own avocado oil hair treatments is a fun and effective way to ensure your hair gets the full benefits of the oil. Here are two easy recipes to get you started: Avocado Oil and Honey Mask Avocado Oil and Egg Protein Treatment In pursuing healthy, beautiful hair, sometimes the best solutions are the simplest ones. Avocado oil is a testament to the power of nature’s ingredients and the wisdom of traditional hair care practices. Whether you go for store-bought products or delight in the craft of homemade hair treatments, avocado oil could be the missing piece in your hair care puzzle. Are you a convert to the avocado oil cause, or are you ready to try it? We’d love to hear your stories about using avocado oil for hair. Share your experiences in the comments below and join the conversation. And if you’re hungry for more natural hair care tips, stay tuned for future articles dedicated to the beauty in your pantry. Frequently Asked Questions What is avocado oil, and how is it beneficial for hair?  Avocado oil is a natural oil extracted from the pulp of avocados. It is rich in vitamins, minerals, and fatty acids that nourish and strengthen hair. Its moisturizing properties help to hydrate dry and damaged hair, making it softer and more manageable. How does avocado oil promote hair growth? Avocado oil contains nutrients like vitamin E, stimulating hair follicles and promoting healthy hair growth. It also improves scalp blood circulation, ensuring hair follicles receive adequate nutrients and oxygen for optimal growth. Is avocado oil suitable for all hair types? Yes, avocado oil suits all hair types, including dry, damaged, oily, and curly. It’s lightweight and non-greasy, making it ideal for moisturizing without weighing down hair. Can avocado oil help with hair breakage and split ends? Yes, avocado oil is effective in reducing hair breakage and split ends. Its nourishing properties strengthen hair strands, preventing breakage and promoting overall hair health. How should I use avocado oil for my hair? Avocado oil can be used in various ways for hair care. You can apply it directly to your scalp and hair as a pre-shampoo treatment or

Avocado Oil for Hair: Benefits and Application Methods Read More »

aloe vera gel-Aloe Vera Gel for Razor Bumps

How to Use Aloe Vera Gel for Razor Bumps

Razor bumps, also known as pseudofolliculitis barbae, can be an annoying problem for many people. They appear as small, irritated bumps on the skin after shaving. These bumps are often caused by hair growing back into the skin, leading to inflammation and discomfort. Common reasons for razor bumps include improper shaving techniques, sensitive skin, and using dull razors. Finding effective treatments for razor bumps is essential because they can cause pain, itchiness, and even infection if not treated properly. Aloe vera gel is a natural remedy with healing and soothing properties. It has become more popular recently because of its effectiveness and natural qualities. Aloe vera gel is derived from the aloe vera plant leaves and can help address various skin problems. While other products can also help, people prefer natural remedies like aloe vera gel. In this article, we’ll explore how to use aloe vera gel for razor bumps and prevent them from coming back. Understanding Razor Bumps Razor bumps occur when shaved hair grows back into the skin, irritating. They look like small, red, or skin-colored bumps and can sometimes be filled with pus. Causes and Contributing Factors There are various factors contribute to the development of razor bumps: Improper Shaving Techniques Sensitive Skin Using Dull Razors Common Symptoms and Appearance Razor bumps usually appear as small, raised bumps on the skin. They may be red or flesh-colored and can sometimes be filled with pus. These bumps can cause itching, pain, and discomfort. In some cases, they can lead to infection if not treated properly. Benefits of Aloe Vera Gel for Skin Aloe vera, a plant with thick, green leaves brimming with a soothing gel, has been a trusted remedy for various skin conditions for centuries. Its rich content of vitamins, minerals, and antioxidants has consistently proven to maintain skin health and radiance. Key Benefits for Skin Care Anti-inflammatory Properties Aloe vera gel is a versatile solution for various skin conditions. Its anti-inflammatory properties can reduce swelling and redness, making it an ideal remedy for minor burns, insect bites, and other skin irritations. Soothing and Cooling Effects If you’ve ever experienced the discomfort of a sunburn, you know how soothing aloe vera gel can be. It provides an instant cooling sensation, relieving the burning and itching. It’s like a natural, comforting ice pack for your skin. Moisturizing Benefits Dry skin can be rough and itchy. Aloe vera gel is an excellent moisturizer that doesn’t leave a greasy feeling. It hydrates your skin, making it soft and smooth. Because it’s lightweight, it’s suitable for all skin types, including oily and acne-prone skin. Healing Properties Aloe vera gel helps speed up the healing process of cuts, scrapes, and burns. Its natural compounds stimulate skin repair and growth, helping wounds heal faster. This makes it a great addition to your first-aid kit. How Aloe Vera Gel Helps with Razor Bumps Razor bumps occur when hair grows back into the skin after shaving, causing inflammation and irritation. Aloe vera gel can help treat these bumps effectively. Reduces Inflammation When applied to razor bumps, aloe vera gel reduces swelling and redness. Its anti-inflammatory properties calm the irritated skin, making the bumps less noticeable and painful. Soothes Irritation and Redness The cooling effect of aloe vera gel provides immediate relief from the burning and itching caused by razor bumps. It soothes the skin, making you feel more comfortable. Promotes Healing of the Skin Aloe vera gel not only soothes but also promotes skin healing. Its healing properties help repair the damaged skin around razor bumps, allowing them to heal faster and reducing the chance of scarring. Prevents Infection Razor bumps, if not treated properly, can lead to infection. However, aloe vera gel, with its antibacterial properties, acts as a protective shield, preventing infection and ensuring the health and cleanliness of your skin. Choosing the Right Aloe Vera Gel Choosing the suitable aloe vera gel is important to get the best results. Here are some tips to help you pick a good one: Look for Pure Aloe Vera Gel Avoid Products with Added Chemicals or Fragrances Check the Ingredient List Recommended Brands and Products Step-by-Step Guide to Using Aloe Vera Gel for Razor Bumps Cleanse the Affected Area Pat Dry with a Clean Towel How to Apply Aloe Vera Gel Directly to the Skin Recommended Amount to Use Gently Massage the Gel into the Skin How Often to Apply Aloe Vera Gel for Best Results Morning and Evening Routines Additional Tips for Preventing and Treating Razor Bumps Use a Sharp Razor Using a sharp razor is crucial for a smooth shave. A dull razor can tug at your hair, causing irritation and razor bumps. Always replace your razor blades regularly to ensure they are sharp. Shave in the Direction of Hair Growth Shaving against the grain can lead to ingrown hairs and razor bumps. Always shave in the direction your hair grows to reduce irritation. This method also provides a closer shave without damaging your skin. Avoid Shaving Too Frequently Shaving too often can irritate your skin and increase the risk of razor bumps. Give your skin time to heal between shaves. Shaving every other day or a few times a week can help prevent irritation. Exfoliate Regularly Exfoliating removes dead skin cells that can clog hair follicles and cause razor bumps. Use a gentle exfoliant once or twice weekly to keep your skin smooth and bump-free. Moisturize Daily Keeping your skin hydrated is essential for preventing razor bumps. Use a good moisturizer daily, especially after shaving, to keep your skin soft and reduce irritation. Look for a moisturizer suitable for your skin type. Use Gentle Skin Care Products Harsh chemicals and fragrances in skin care products can irritate your skin and cause razor bumps. Opt for gentle, hypoallergenic products that soothe and protect your skin. Check the labels to ensure they are free from irritants. Using aloe vera gel for razor bumps is a reassuring solution. It not only soothes irritation and reduces

How to Use Aloe Vera Gel for Razor Bumps Read More »

A woman with an Aloe vera plant in hand-benefits of aloe vera for your hair

6 Benefits of Aloe Vera for Your Hair

Aloe vera is a popular plant known for its healing and soothing properties. For centuries, people have used it to treat skin issues, heal wounds, and promote hair health. In ancient Egypt, they called it the “plant of immortality” because of its many benefits. Today, aloe vera is a favorite ingredient in natural hair care products due to its rich nutrient content and gentle nature. Using natural remedies in modern hair care is more important than ever. Many commercial hair products contain harsh chemicals that can damage hair over time. Natural remedies like aloe vera offer a safer, more effective way to maintain healthy hair. Aloe vera helps with everything from soothing an itchy scalp to promoting hair growth and improving hair texture. Aloe Vera can transform your hair care routine. This plant can moisturize dry hair, reduce dandruff, and even help with hair growth. By understanding the benefits of Aloe Vera for your hair, you can make better choices for your hair care routine and enjoy healthier, shinier locks. Nutritional Composition of Aloe Vera Vitamins and Minerals in Aloe Vera Aloe vera is packed with essential vitamins and minerals that are great for hair health. It contains vitamins A, C, and E, which are antioxidants that help protect hair from damage. Vitamin B12 and folic acid in aloe vera also support healthy hair growth. Minerals like calcium, magnesium, and zinc strengthen hair and improve its overall condition. Enzymes and Amino Acids Beneficial for Hair Aloe vera is rich in enzymes that promote healthy hair. These enzymes help remove dead skin cells from the scalp, blocking hair follicles and hindering hair growth. Proteolytic enzymes in aloe vera, such as aliiase and amylase, break down these dead cells and clean the scalp, making way for new hair to grow. Aloe vera also contains amino acids, which are the building blocks of protein. Hair is made mostly of a protein called keratin, and amino acids help repair and strengthen hair strands. The amino acids in aloe vera, like lysine and methionine, nourish the hair and improve its texture. Overview of Aloe Vera’s Hydrating Properties Aloe vera is excellent for hydrating hair. Its gel-like consistency helps lock in moisture, making hair smooth and shiny. The hydrating properties of aloe vera help prevent dryness and frizz, common problems for many people. Aloe vera also has a high water content, which helps keep the hair and scalp hydrated. This can be especially beneficial in dry or hot climates where hair tends to lose moisture quickly. Benefits of Aloe Vera for Your Hair 1.Strengthens and Nourishes Hair Aloe vera is packed with nutrients and vitamins that play a crucial role in strengthening and nourishing your hair. Its rich composition includes vitamins A, C, and E, along with minerals like zinc and magnesium. These nutrients work together to fortify hair strands from within, making them more resilient to damage and breakage. Using aloe vera gel or juice on your hair provides deep nourishment. The gel penetrates the hair shaft, replenishing moisture and restoring vitality. This hydration helps in maintaining hair elasticity, reducing the risk of brittleness and split ends. Regular use of aloe vera promotes healthier, stronger hair that looks and feels revitalized. 2.Reduces Dandruff Dandruff can be a nuisance, causing white flakes and an itchy scalp. Aloe vera comes to the rescue with its antifungal and antibacterial properties. These properties help fight off the fungi and bacteria that cause dandruff. When you apply aloe vera to your scalp, it helps keep it clean and free from these pesky microbes. Not only does aloe vera help get rid of dandruff, but it also soothes your itchy scalp. Its cooling effect calms the skin and reduces inflammation, which means less itching and a more comfortable scalp. Aloe vera’s natural enzymes and vitamins also help moisturize your scalp, preventing dryness that can cause itching. 3.Balances Oil Production Aloe vera’s deep cleansing action is beneficial for balancing oil production on the scalp. It gently removes excess oil and debris, unclogging hair follicles and pores. Keeping your scalp clean is important to prevent issues like dandruff and seborrheic dermatitis. These problems can occur when the oil levels on your scalp become imbalanced. So, it’s crucial to take care of your scalp by keeping it clean and healthy. Aloe vera helps maintain a healthy scalp by regulating oil production. It does this without completely removing natural oils, which is important for keeping the scalp clean and refreshed. This balance is crucial for preventing conditions that can harm hair growth and appearance. 4.Promotes Hair Growth Aloe Vera is like a magic potion for your hair! It helps your hair grow faster and healthier by stimulating your hair follicles. Hair follicles are tiny pockets in your scalp from which hair grows. Aloe Vera gets into these follicles and wakes them up, encouraging them to produce more hair. This process makes your hair grow thicker and more robust. One of the key ingredients in aloe vera is proteolytic enzymes. These enzymes work like tiny cleaners that remove dead skin cells from your scalp. When dead skin cells build up, they can block your hair follicles, stopping hair growth. By clearing away these dead cells, aloe vera helps your hair follicles breathe and grow hair more efficiently. 5.Prevents Hair Loss Aloe Vera can help prevent hair loss by strengthening hair strands and reducing scalp inflammation. Aloe vera is packed with vitamins and minerals essential for healthy hair. It contains vitamins A, C, and E, which promote cell turnover, encouraging healthy cell growth and shiny hair. Vitamin B12 and folic acid in aloe vera help prevent hair from falling out. The amino acids and fatty acids present also help strengthen hair, making it less likely to break. Aloe vera has anti-inflammatory properties that soothe and calm the scalp. When the scalp is inflamed, it can lead to hair loss because the hair follicles are stressed. Aloe vera cools and conditions the scalp, reducing any inflammation. This

6 Benefits of Aloe Vera for Your Hair Read More »

Beautiful female eyes with long eyelashes-Vitamins for Eyelashes Growth

5 Vitamins for Eyelashes Growth

We often associate beauty with glowing skin, luscious hair, and dazzling eyes. Specifically, our eyelashes are more than just functional; they’re a fashion statement. Long, thick lashes can accentuate one’s eyes, boosting confidence and allure. But what happens when those lashes start to thin?  Eyelash loss or thinning—known as madarosis—can be attributed to factors such as age, genetics, hormonal imbalances, or even overuse of makeup. However, there’s a glimmer of hope. Science tells us that a balanced diet rich in specific vitamins and nutrients can support the growth and health of our beloved lashes. In this guide, we’ll flutter through the essentials of eyelash care, focusing on the vitamins that can help you achieve the lash ‘look’ you’ve always wanted. Four-Phase Cycle of Eyelash Growth The growth of eyelashes occurs in a fascinating four-phase cycle, each with its distinct characteristics and functions. Let’s delve into these phases to understand better how our eyelashes develop and renew. 1.   Anagen Phase (Active Growth): This is the first phase, where eyelashes are actively growing. The cells in the hair follicles divide rapidly, leading to new lash growth. This phase can last anywhere from 30 to 45 days. 2.   Catagen Phase (Transition): In this phase, eyelash growth slows down, and hair follicles shrink. It’s a transitional period that lasts about two to three weeks. 3.   Telogen Phase (Resting): During this phase, eyelashes rest. They don’t grow, and the old lashes remain in place. This phase lasts for around 100 days before the old lashes are shed. 4.   Exogen Phase (Shedding): The final phase is when old eyelashes shed naturally to make way for new ones. This shedding process is part of the eyelash renewal cycle and ensures that new, healthy lashes can grow. Understanding the four phases of eyelash growth is essential for caring for your lashes properly. You can support healthy eyelash growth throughout the cycle by providing the proper nutrients and maintaining good hygiene. Vitamins for Eyelashes Growth Vitamins play a significant role in promoting healthy eyelash growth. They affect different growth cycle phases, ensuring that lashes grow strong and lush. Vitamin A Vitamin A is crucial in maintaining healthy eyelashes by supporting sebum production. This oily substance keeps lashes moisturized and prevents them from becoming dry and brittle. Food Sources: Include carrots, sweet potatoes, leafy greens like spinach and kale, and fruits such as mangoes and apricots to boost your Vitamin A intake. Vitamin B B-complex vitamins, especially Biotin (Vitamin B7) and Niacin (Vitamin B3) contribute to strong and resilient lashes. Biotin promotes keratin production, which is essential for lash strength. At the same time, Niacin improves blood circulation to the hair follicles, supporting healthy growth. Food Sources: Incorporate eggs, nuts (like almonds and peanuts), whole grains, avocados, and legumes into your meals to ensure you get enough Vitamin B for optimal lash health. Vitamin C Vitamin C is an antioxidant that helps protect eyelash follicles from damage caused by free radicals. It also aids collagen production, which is vital for maintaining lash strength and preventing breakage. Food Sources: Consume citrus fruits (like oranges, lemons, and grapefruits), bell peppers (especially red and yellow), strawberries, kiwi, and broccoli to boost your Vitamin C levels and support healthy eyelashes. Vitamin D Vitamin D plays a role in the growth cycle of eyelashes by supporting follicle health. It also helps prevent premature shedding and promotes the growth of thicker, fuller lashes. Food Sources: While sunlight is a natural source of Vitamin D, you can also get it from dietary sources such as fatty fish (like salmon and mackerel), fortified dairy products (like milk and yogurt), eggs, and mushrooms. Vitamin E Vitamin E moisturizes and nourishes eyelashes, keeping them soft and flexible. It also protects against environmental damage, such as UV radiation, which can weaken lashes over time. Food Sources: Include nuts (such as almonds and sunflower seeds), seeds (like flaxseeds and chia seeds), leafy greens (such as spinach and Swiss chard), and vegetable oils (like sunflower oil and olive oil) in your diet to increase your Vitamin E intake and promote healthy lashes. The Growth and the Gourmet Our dietary choices can be as influential as our applications of serums and makeup. Ensuring a balanced intake of vitamins and nutrients can offer many benefits outside of eyelash health. Here are some practical tips to incorporate these vitamins into your daily life: Taking on the challenge of reinvigorating your eyelash health is a collaborative endeavor. It’s a tapestry of choices, from the food we eat to the products we apply and to the understanding of our body’s needs. The pursuit of stunning lashes should never put your health at risk, so remember to balance any lifestyle adjustments with professional advice. Your eyes are your windows to the world—don’t be afraid to adorn them with the luscious curtains they deserve. Frequently Asked Questions How long does it take for eyelashes to grow? Eyelashes undergo a four-phase growth cycle that typically lasts three to four months. However, individual growth rates may vary. Can vitamins help in growing longer eyelashes?  Yes, vitamins play a crucial role in promoting healthy eyelash growth by nourishing the hair follicles and supporting the overall health of the lashes. Which phase of the eyelash growth cycle is most important for vitamin impact? The anagen phase, or active growth phase, is where vitamins have the most significant impact on promoting longer and thicker eyelashes. Are there any side effects of taking vitamins for eyelash growth? When taken within recommended doses, vitamins for eyelash growth are generally safe and unlikely to cause side effects. However, excessive intake may lead to adverse reactions, so following dosage guidelines is essential. How can I incorporate vitamins into my daily routine for eyelash growth? Vitamin-rich foods include fruits, vegetables, lean proteins, and whole grains. Additionally, vitamin supplements specifically formulated for hair and eyelash growth are available. Is it necessary to consult a doctor before taking vitamins for eyelash growth? While vitamins are generally safe, it’s always advisable to consult a healthcare professional before starting any new supplement

5 Vitamins for Eyelashes Growth Read More »

hair dresser washing a woman's hair-Water-Only Hair Washing

Water-Only Hair Washing: Does It Make Your Hair Greasy?

Hair care is deeply personal, and we have unique rituals and routines. But what if I told you there’s a trend to scrap the shampoo from your regime? Known as ‘water-only washing,’ this method has garnered attention as a potentially sustainable and healthful option for hair care. But is it truly the greasy nightmare it’s made out to be, or is it a path to luscious locks that don’t cost the Earth? We’ll explore the water-only hair-washing trend in-depth, busting myths and shedding light on whether it’s a golden ticket to natural hair bliss or a slippery slope to oiliness. The Science Behind Water-Only Hair Washing When we talk about washing our hair with water, it’s not just about getting it wet. There’s a fascinating science behind how water interacts with our hair and scalp, affecting their health and appearance. Natural Oils and Water Interaction: Our scalp produces natural oils called sebum, which are crucial in moisturizing and protecting our hair. When we wash our hair with water, these oils interact with the water molecules, forming a protective layer that prevents excessive drying and damage. Effect on Scalp’s Oil Production: Contrary to common belief, water-only washing doesn’t strip away all the natural oils from our scalp. Instead, it helps regulate oil production, keeping the scalp balanced and healthy. This natural balance is essential for maintaining hair strength and shine. Impact on Hair Follicles: Water-only washing can also benefit the hair follicles by improving blood circulation to the scalp. This increased circulation nourishes the follicles, promoting healthy hair growth and reducing the risk of hair loss. Maintaining pH Balance: One key aspect of water-only hair washing is its ability to maintain the scalp’s pH balance. A balanced pH level is crucial for a healthy scalp environment and prevents dryness, itchiness, and dandruff. Advantages of a Water-Only Hair Washing Routine Embracing a water-only hair-washing routine has several advantages that contribute to overall hair health and well-being. Reduced Exposure to Harsh Chemicals: Traditional shampoos often contain harsh chemicals like sulfates and parabens, which can strip away natural oils and damage the hair shaft. By washing with just water, you eliminate exposure to these chemicals, leading to healthier and less prone to breakage. Preservation of Natural Oils: Water-only washing allows your scalp’s natural oils to thrive, providing essential nourishment and protection to your hair. This preservation of natural oils results in softer, more manageable hair that retains moisture effectively. Cost-Effectiveness and Environmental Benefits: Adopting a water-only hair-washing routine can save money when purchasing hair care products regularly. Additionally, it contributes to environmental sustainability by reducing plastic bottles and chemical-laden products that harm the planet. Improved Hair Texture and Appearance: Over time, water-only washing can improve the texture and appearance of your hair. It helps restore the hair’s natural shine, reduce frizz, and enhance its overall health, leading to hair that looks and feels great. Enhanced Scalp Health: Water-only washing can alleviate common scalp issues like dryness, itchiness, and flakiness by maintaining a natural balance of oils and promoting a healthy scalp environment. Potential Drawbacks of Washing Hair with Water Only Washing your hair with just water can have its share of challenges and drawbacks that you must be aware of. Here are some key points to consider: Initial Greasiness: When you start water-only washing, your hair may feel greasy initially. This is because your scalp is used to regular shampoo, which strips away oils. Over time, your scalp will adjust, but this transition period can be challenging. Buildup Removal: Without the cleansing agents in shampoo, it can be harder to remove buildup from products like gels, serums, and oils. You may need to find alternative methods or use less product to prevent excessive buildup. Impact on Hair Texture: Depending on your hair type, water-only washing can affect the texture and manageability of your hair. Some people find that their hair becomes softer and more manageable, while others may experience changes in volume and texture. Maintaining Cleanliness: While water can rinse away some dirt and impurities, it may not be sufficient for everyone to feel completely clean. You may need to explore additional cleansing methods, such as occasional mild cleansers or natural remedies like apple cider vinegar rinses. Tips for Transitioning to Water-Only Washing Transitioning to a water-only hair-washing routine requires patience and the right approach. Here are some tips to help you make a smooth transition: Gradual Reduction: Start by gradually reducing the frequency of shampooing. This allows your scalp to adjust to producing less oil over time. Natural Cleansing Methods: Incorporate natural cleansing methods into your routine, such as using diluted apple cider vinegar as a rinse. This can help remove buildup and balance the pH of your scalp. Scalp Massage: Regular scalp massage can stimulate blood flow and distribute natural oils, promoting a healthier scalp and hair. Hydration: Drink plenty of water and eat a balanced diet rich in vitamins and minerals to support overall scalp health and oil production regulation. Patience: Be patient with the transition process. It may take a few weeks for your scalp to adapt to water-only washing, so don’t get discouraged if you experience some greasiness initially. Effect of Water-Only Washing on Different Hair Types Water-only washing can affect different hair types, presenting unique challenges and benefits. Curly Hair  Due to its structure, curly hair tends to be drier, making water-only washing beneficial as it helps retain natural oils. This method can enhance moisture levels, leading to healthier curls with improved definition and reduced frizz. Straight Hair  Water-only washing for straight hair may initially result in greasiness as the scalp adjusts its oil production. However, with consistent practice, the scalp regulates oil secretion, promoting a balanced appearance and reducing the need for frequent washing. Thick Hair  Thick hair can benefit from water-only washing by maintaining natural oils without weighing down the strands. Regular scalp massages during washing can ensure an even distribution of oils, resulting in softer, more manageable hair. Thin Hair  Water-only washing may challenge thin hair, as excess oil buildup can make it appear greasy. Proper scalp cleansing

Water-Only Hair Washing: Does It Make Your Hair Greasy? Read More »

Woman cosmetologist holding wooden stick with wax-Does Waxing Reduce Hair Growth

Busting the Myth: Does Waxing Reduce Hair Growth?

Are you a frequent visitor to your local waxing salon, or do you diligently wax at home in the hopes of achieving a lifetime of smooth, hairless skin? If you’ve been on the quest for the holy grail of hair removal — a method that not only rids you of unwanted hair but also thins it out or slows down its growth — you’re not alone. Waxing is a popular choice for many individuals looking for a longer-lasting solution to their hair growth woes, but does waxing reduce hair growth, or is this no more than a persistent beauty myth? We’re about to peel back the layers on this follicular topic, exploring the science behind hair growth, the mechanics of waxing, and whether this method can influence the lifecycle of your luscious locks. A Brief History of Waxing Waxing finds its roots in ancient societies where hair removal was not just a beauty practice but often a cultural and religious ritual. From the ancient Egyptians, who believed a hairless body was a sign of cleanliness, to the Persians, who laid the groundwork for the waxing we know today, people have employed various waxes and techniques to achieve hairless skin. Today, it is one of the most popular hair removal methods worldwide. Understanding Hair Growth Before we get to the nitty-gritty of waxing, it’s essential to understand the natural process of hair growth. The human body has millions of hair follicles, and hair goes through distinct growth cycles. Anagen Phase The anagen phase is when your hair is actively growing. This phase can last anywhere from two to six years and determines the length of your hair. The size of the anagen phase is primarily genetic and varies from person to person. Catagen Phase The catagen phase is a transitional period that lasts about ten days. During this phase, the hair follicle shrinks and detaches from the dermal papilla, which is its nutrient supply. Telogen Phase The telogen or resting phase is when the hair fully matures and prepares to fall out. This phase can last around three months; at the end of it, the hair will shed, and the anagen phase will start again. Waxing Process Explained Waxing is a hair removal method that involves applying a layer of wax to the skin. The wax adheres to the hair and is quickly pulled off, removing the hair from the root. There are different types of waxes, from the traditional soft and hard waxes to the modern strips and sugar waxes, each offering a slightly different application and removal process. Effects on the Hair Follicles When hair is removed from the root, it generally takes longer to grow back than other hair removal methods, such as shaving. Over time, consistent waxing can weaken the hair follicles, which might contribute to slower regrowth and finer hair. Myth vs. Reality: Does Waxing Reduce Hair Growth? The popular belief is that waxing can result in a permanent reduction of hair growth. However, the reality is a bit more complex. Scientific Perspective Limited scientific evidence suggests that waxing can permanently reduce hair growth. While waxing can damage hair follicles with consistent use, the hair growth reduction is not likely permanent. The degree of damage can vary based on the individual’s skin type and hair texture. Temporary vs. Permanent Hair Removal Waxing is a semi-permanent hair removal method because it removes hair from the root. This generally means that hair will take longer to grow back and may appear finer. However, only electrolysis and laser hair removal offer longer-lasting or permanent results. Tips for Hair Growth Management Understanding how to take care of your skin post-waxing correctly is crucial to maximize the potential for hair growth reduction. Post-Waxing Care After waxing, it’s essential to keep the skin clean and to apply soothing products to prevent ingrown hairs and irritation. Regular exfoliation can also help the hair grow back without obstruction, contributing to a smoother regrowth process. Other Hair Removal Methods If you’re looking for other methods to manage hair growth, consider techniques such as epilation, depilatory creams, or even professional treatments like laser or electrolysis for longer-term solutions. Conclusion The quest for reduced hair growth often leads beauty enthusiasts to wax, hoping the next appointment might bring the desirable thinned-out strands and slower regrowth. While waxing can play a role in hair growth management, it’s important to maintain realistic expectations and consider all options for a well-rounded hair removal routine. Ultimately, whether waxing reduces hair growth is still up for debate. What needs to be put up for debate is the need for informed decision-making when it comes to your personal grooming choices. With proper care, waxing can be an effective way to enjoy smooth skin for longer, and combining it with other methods can provide a comprehensive approach to managing hair growth. Remember, beauty myths can be as stubborn as the unwanted hair we hope to eliminate. Stay informed, stay consistent with your chosen method, and know that achieving your ideal hair removal results is a personalized journey. Frequently Asked Questions Does waxing reduce hair growth permanently? No, waxing does not reduce hair growth permanently. It removes hair from the root, which may result in slower regrowth and finer hair over time, but it does not stop hair from growing altogether. How often should I wax to see a reduction in hair growth? The frequency of waxing varies for each person. Generally, consistent waxing over time can lead to thinner and less noticeable hair growth. However, factors such as hair type and hormonal changes can affect the results. Are there any risks or side effects associated with frequent waxing? While waxing is generally safe, frequent waxing can lead to skin irritation, redness, or ingrown hairs. Following proper skincare routines and techniques is essential to minimize these risks. Can waxing make hair grow back thicker or darker? No, waxing does not cause hair to grow back thicker or darker. The appearance of thicker hair after

Busting the Myth: Does Waxing Reduce Hair Growth? Read More »

hand of a woman with ringworm-Home Remedies for Ringworm

10 Best Home Remedies for Ringworm

Dealing with ringworm can be an unsightly and uncomfortable experience. This common fungal infection is highly contagious and can affect various body parts, leading to circular rashes that are often raised and red on the edges and clearer in the center, giving the distinct appearance of a ring or ring. Despite its name, Ringworm has no relation to worms. Still, it is caused by a fungus and can technically appear in any ring-shaped form. While there are over-the-counter treatments, some might seek natural, homemade solutions, especially if they prefer to avoid pharmaceuticals or have experienced skin sensitivity to standard treatments. In this blog, we will explore ten of the most popular and effective home remedies for treating ringworm, focusing on natural ingredients that can be found right in your kitchen cupboard or backyard.  Causes of Ringworm Before we discuss remedial action, understanding what causes ringworm is critical. This condition is primarily caused by a group of fungi called dermatophytes, which thrive on the dead tissues of the skin, hair, and nails. It spreads through direct contact with an infected person or animal and by touching an infected surface or object. In some cases, ringworm can also spread by contact with soil, so be mindful of exposure when gardening, hiking, or indulging in outdoor activities. Specific populations, such as people with compromised immune systems, children, and individuals with particular occupations, have a higher risk of contracting ringworm. What are The Symptoms of Ringworm? The signs of ringworm are usually quite apparent, though diagnosis by a healthcare professional is essential for confirmation. Symptoms can vary depending on the area affected, but common manifestations include: Ringworm on the scalp can lead to crusting and scaling, but it can also present as small, red bumps that may ooze. Ringworm that affects the feet (athlete’s foot), groin (jock itch), or body often has less distinct edges. Nevertheless, when it comes to treatment, these remedies can be quite effective for various types of ringworm. Home Remedies for Ringworm 1. Tea Tree Oil Tea tree oil is renowned for its powerful antifungal properties. It is extracted from the leaves of the Melaleuca alternifolia, a small tree native to Australia. This home remedy is popular for treating fungal infections and is a prime contender for combating ringworm. How to Use it: Some people may experience skin irritation as a side effect, so it’s wise to patch-test a small area before completing the application. 2. Apple Cider Vinegar Apple cider vinegar is a pantry staple with many surprising applications. Its acidity can help prevent the growth of fungus and bacteria—making it a handy treatment for ringworm. How to Use it: The acidity of apple cider vinegar can cause a stinging sensation. If it’s too harsh on your skin, dilute it or mix it with coconut oil for a soothing effect. 3. Coconut Oil Coconut oil has been traditionally used not just for cooking but for its potent medicinal properties as well. It contains fatty acids that have potent antifungal effects. How to Use it: 4. Aloe Vera Aloe vera’s soothing properties make it a popular remedy for several skin conditions. It’s known for reducing redness and discomfort associated with ringworm while possessing some antifungal characteristics. How to Use it: Aloe vera gel is generally safe, but if you develop a rash or irritation, you should discontinue use or try a different brand. 5. Garlic Garlic is a well-known kitchen ingredient used medicinally for centuries due to its antifungal and antibacterial properties. How to Use it: While garlic can be a potent treatment, it’s not suitable for everyone. People on blood-thinning medications should avoid excessive garlic consumption, as it can increase the risk of bleeding. 6. Turmeric Turmeric is renowned for its anti-inflammatory and antifungal properties, making it a potent ally against ringworm. The active compound, curcumin, can inhibit the growth of fungi, offering relief and healing from the inside out. How to Apply Turmeric 7. Oregano Oil With its active ingredient, carvacrol, Oregano oil is a well-known natural antifungal. This essential oil can combat the fungus responsible for ringworms and inhibit their growth. How to Apply Oregano Oil 8. Grapefruit Seed Extract Grapefruit seed extract (GSE) has potent antimicrobial and antifungal properties. When used correctly, it can significantly reduce the growth of several types of Candida and other fungal strains. How to Apply GSE 9. Lavender Essential Oil Lavender essential oil is not only soothing but also antifungal. Research suggests it can effectively inhibit various forms of pathogenic fungi, making it a gentle yet effective treatment for ringworm. How to Apply Lavender Oil 10. Lemongrass Oil Lemongrass oil is a potent antifungal that can inhibit the reproduction and growth of fungal cells. It has been used traditionally to treat various forms of body fungi, including ringworm. How to Apply Lemongrass Oil Conclusion Natural home remedies can be effective against ringworm, offering a safe and often cost-efficient approach to treatment. However, each person’s skin is unique, and reactions may vary. Spot-testing any new application on a small area of your skin is crucial to check for sensitivity or allergic reactions.  These remedies are simple to apply and can often be the first line of defense in treating conditions like ringworm. Remember, sustained hygiene practices and living in a clean environment are crucial in preventing ringworm. However, with these natural remedies, relief may be just a few applications away in case of infection. If you currently have ringworm or know someone who does, sharing this blog post can be a small act of sharing valuable knowledge about accessible home remedies. Nevertheless, always ensure your healthcare decisions are based on comprehensive medical advice tailored to your health needs. The battle against ringworms can be fought with nature’s gifts. Still, a doctor’s consultation on whether the infection is persistent or widespread is the winning move for a healthy and ringworm-free you. Frequently Asked Questions What is ringworm, and what causes it? Ringworm is a fungal infection affecting the skin, scalp, and nails. It

10 Best Home Remedies for Ringworm Read More »

young woman with acne on her face-foods that cause acne

11 Foods That Cause Acne and Bad Skin

If you’re battling stubborn pimples and pesky breakouts, your diet might hold the key to clearer skin. It’s a dermatological old tale—the food we eat is intricately linked with the health of our skin. For many, the idea that certain foods can trigger acne and other skin woes might be new, leading us to look closer at our everyday diet. Here’s a detailed rundown of the eleven foods that cause acne. These are the most surprising skin saboteurs hiding in our meals. It’s no secret that good nutrition is the building block for good health, including the health of our largest organ—our skin. However, pinpointing the exact dietary culprits leading to breakouts can be more complex than it seems. Our diets are as unique as our genetic makeup; what may cause skin flare-ups for one person might not affect another. People who are concerned about their health and want to have clear skin might find this subject interesting. Teenagers who often experience acne can improve their skin by adjusting their diet. Skincare enthusiasts who know a lot about topical treatments may discover that the secret to clear skin also lies in their pantry. To make it easy to understand, we have kept the information short and to the point. Foods That Cause Acne and Bad Skin Here are the top eleven foods commonly consumed by many, which may inadvertently aggravate skin issues. 1. Greek Yogurt Greek yogurt can be a double-edged sword for your skin, often touted as a health food high in protein and probiotics. For those sensitive to dairy, the high levels of growth hormones and the natural hormones present in milk, particularly skim milk, can increase acne. Cutting back on dairy products, such as Greek yogurt, might help some people improve their complexion. Studies have found that eating dairy can cause an overproduction of oil, which can clog pores and lead to breakouts. Researchers are still studying why this happens. 2. Shrimp Shrimp and other shellfish can have detrimental effects on some people’s skin due to their high levels of iodine. Our bodies need iodine for proper thyroid function. Still, excessive amounts can lead to acne, especially in those predisposed to the condition. If your skin flares up after a seafood feast, it might be worth considering a potential iodine sensitivity as the root cause. Moderation, in this case, is key, and opting for other sources of lean protein could be a wise choice for your skin and overall health. 3. Peanut Butter If you love peanut butter, keep in mind that some commercial brands may contain added sugars and hydrogenated oils. These ingredients can cause acne-prone skin to worsen. Although peanuts themselves have a low glycemic index, it’s important to check the labels of peanut butter brands to make sure they don’t contain these additives. Consuming foods with a high glycemic index raises blood sugar levels, triggering the body to produce more insulin. This can lead to inflammation and increased oil production, which are critical factors in the development of acne. 4. Spinach An unexpected guest on the list, spinach and other high-oxalate greens can cause some individuals acne and other skin issues. Oxalates, while not problematic for most, can crystallize in body tissues, leading to inflammation, which can manifest in the skin as acne. This doesn’t mean you should avoid spinach altogether; instead, those predisposed to acne might want to limit their intake. Cooking spinach can help break down oxalates, making them less likely to cause issues for sensitive individuals. 5. Whole Wheat Bread You might be surprised that your seemingly healthy whole-wheat bread could contribute to your skin concerns. Whole wheat bread, like other high-glycemic carbohydrates, can lead to a spike in blood sugar levels and, subsequently, an increase in acne. The refining process of grains affects how they are digested, which, in turn, affects blood sugar levels. Swapping out white bread for whole wheat might seem like a good move, but for some, the refined whole wheat could still be problematic for their skin. 6. Kelp Kelp is known for being a healthy food and a great source of iodine. However, for those who are sensitive to iodine, it can cause acne. This is because kelp supplements and food contain high levels of iodine, which can lead to inflamed skin, especially for people who are already dealing with acne. As seaweed has become more popular as a health food, the number of people suffering from acne caused by iodine has also increased. If you have skin problems, it is important to be mindful of your iodine intake, including from kelp, to help keep your skin clear. 7. Milk Milk’s relationship with acne is an age-old controversy. Why is it such a hot-button food for skin health? The dairy product is rich in proteins, particularly whey and casein, which are thought to promote the overproduction of oils in the skin, a common acne culprit. Furthermore, milk has a high glycemic index, which can cause a spike in blood sugar levels, possibly leading to more breakouts. Several studies have found a correlation between dairy consumption and acne, especially in adolescents. That glass of milk may look innocent, but it could foster the environment for blemishes to thrive. 8. Chocolate The notion that chocolate gives you breakouts has traditionally been dismissed as an old wives’ tale. However, studies show that the high sugar content in milk chocolate can increase insulin levels, leading to inflammation and an acne flare-up. A more recent study found that consuming chocolate with a higher percentage of cacao was linked to fewer skin issues, suggesting that it’s not the chocolate per se but the sugar and additives that are the real issue. 9. Salsa Salsa is often considered a healthy condiment option, but it may not be suitable for people with sensitive skin. This is because tomatoes, a key ingredient in most salsas, are highly acidic and can cause skin inflammation, leading to skin eruptions. If you have sensitive skin, it’s

11 Foods That Cause Acne and Bad Skin Read More »

Close up of Helix Piercings

The Ultimate Guide to Helix Piercings

Helix piercings are located on the upper cartilage of the ear. They are popular because they look cool and offer many styling options. People love helix piercings for their unique and fashionable appearance. This type of piercing can be single or multiple, giving you a chance to express your style in different ways. This guide will teach you everything about helix piercings. You will learn about the different types, the piercing process, and how to care for them. Understanding helix piercings before getting one is important to ensure you know what to expect and how to take care of it properly. Understanding Helix Piercings A helix piercing is done on the upper cartilage of the ear. The helix is the ear’s outer rim, which curves from the top of the ear down to the earlobe. Piercings in this area are known for their cool and trendy appearance. Because the cartilage is more complex than the earlobe, it can take longer to heal and may require special care. Types of Helix Piercings There are several types of helix piercings, each offering a different look: Standard Helix Piercing A standard helix piercing is placed on the upper part of your ear cartilage. The piercer uses a needle to create the hole, which can then be decorated with various types of jewelry. Popular choices include small studs, hoops, or barbells. Forward Helix Piercing A forward helix piercing is positioned closer to your face, near where the helix meets the ear’s root. This type of piercing also uses studs or small hoops. Many people get one, two, or even three forward helix piercings in a row, which can look very stylish. Double and Triple Helix Piercings Double and triple helix piercings involve getting two or three piercings in a row along the helix. This creates a unique and eye-catching look. When planning multiple helix piercings, it’s important to consider the placement carefully to ensure the jewelry fits well and looks balanced. Each type of helix piercing offers a different way to express your style. By understanding the options, you can choose the one that best suits your preferences and lifestyle. The Piercing Process Before getting a helix piercing, it’s important to find a reputable piercing studio. Look for places with good reviews and professional staff. Make sure the studio is clean and uses sterilized equipment to prevent infections. During the consultation, the piercer will explain the process and answer any questions you have. They will also check your ear to ensure it’s suitable for a helix piercing. This is a good time to discuss your choice of jewelry and aftercare instructions. The Procedure Step-by-Step Description of the Piercing Process How long does a helix piercing take to heal? A helix piercing will typically take 3-9 months to heal completely. The cartilage at the top of the ear receives less blood flow than other areas, so the healing time can be quite long.  Pain Level and Healing Process Pain perception is subjective, but many individuals report higher levels of discomfort during a helix piercing than earlobe piercings. The process involves more needles and denser tissue, which can lead to a more intense sensation. However, the healing process can be managed with appropriate aftercare, and the satisfaction of the result often outweighs the temporary discomfort. Choosing the Right Jewelry The type of jewelry you choose for your helix piercing can affect both the healing process and your overall comfort. It’s important to select high-quality materials that are safe for long-term wear. Types of Jewelry for Helix Piercings The most common types of jewelry for helix piercings are captive bead rings (CBRs), barbells, studs, and horseshoe rings. Each style enjoys popularity for its specific look and functionality. For example, a stud might be chosen for its understated style and ease of use. At the same time, a hoop can make a bold statement and offer a wider variety of movement and styling options. Materials Matter Your ear’s sensitivity can influence your jewelry material choice, as can your skin’s reaction to certain metals. Implant-grade surgical steel, titanium, and 14k or 18k gold are popular choices. Each of these materials is known for compatibility with the body, reducing the risk of an adverse reaction. Ensuring the metal composition is nickel-free is essential for those with sensitivities. Aftercare Instructions Cleaning and Maintenance To keep your helix piercing clean, use a saline solution or a piercing aftercare spray. These solutions are gentle and help prevent infections. You can buy a pre-made saline solution or make one at home by mixing 1/4 teaspoon of non-iodized sea salt with one cup of warm distilled water. How to Clean Your Piercing Do’s and Don’ts During the Healing Process Common Healing Timeline Healing time for a helix piercing can vary, but it usually takes about 6-12 months. During the first few weeks, you’ll notice swelling and tenderness. This is normal. The swelling should subside after about 3-6 months, and the piercing will feel less tender. Complete healing can take up to a year, so be patient and keep up with the aftercare routine. Managing Healing and Potential Issues Signs of Normal Healing vs. Complications Inflammation, Discharge, and Crusting How to Handle Minor Issues When to Seek Professional Help If you notice severe pain, increased redness, hot skin around the piercing, or thick, dark discharge; you might have an infection. Don’t try to treat it yourself. Instead, visit a professional piercer or a healthcare provider. They can give you the right advice and treatment to prevent further complications. Styling and Trends One of the most exciting aspects of a helix piercing is the variety of ways to style it. From dainty studs to elaborate ear climbers, there’s a look for every fashion sense. Fashionable Ways to Showcase Helix Piercings Mixing and matching different earring styles and sizes on the helix can create a unique and appealing composition. Ear cuffs, huggie hoops, and chain-linked designs are just a few examples of elevating the traditional helix piercing

The Ultimate Guide to Helix Piercings Read More »

Scroll to Top